
If the “ERR_NAME_NOT_RESOLVED” error message is displayed in Chrome because the responsible DNS server is not working, there is not much you can do to fix this.
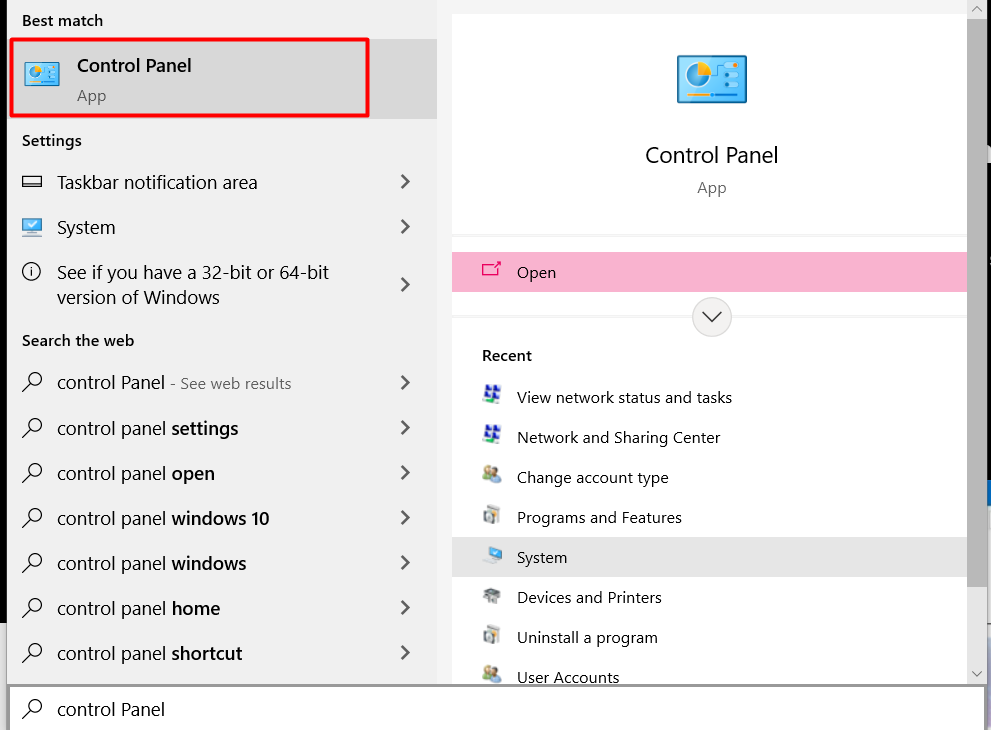
Step 1: Open Control Panel through the Start Menu.
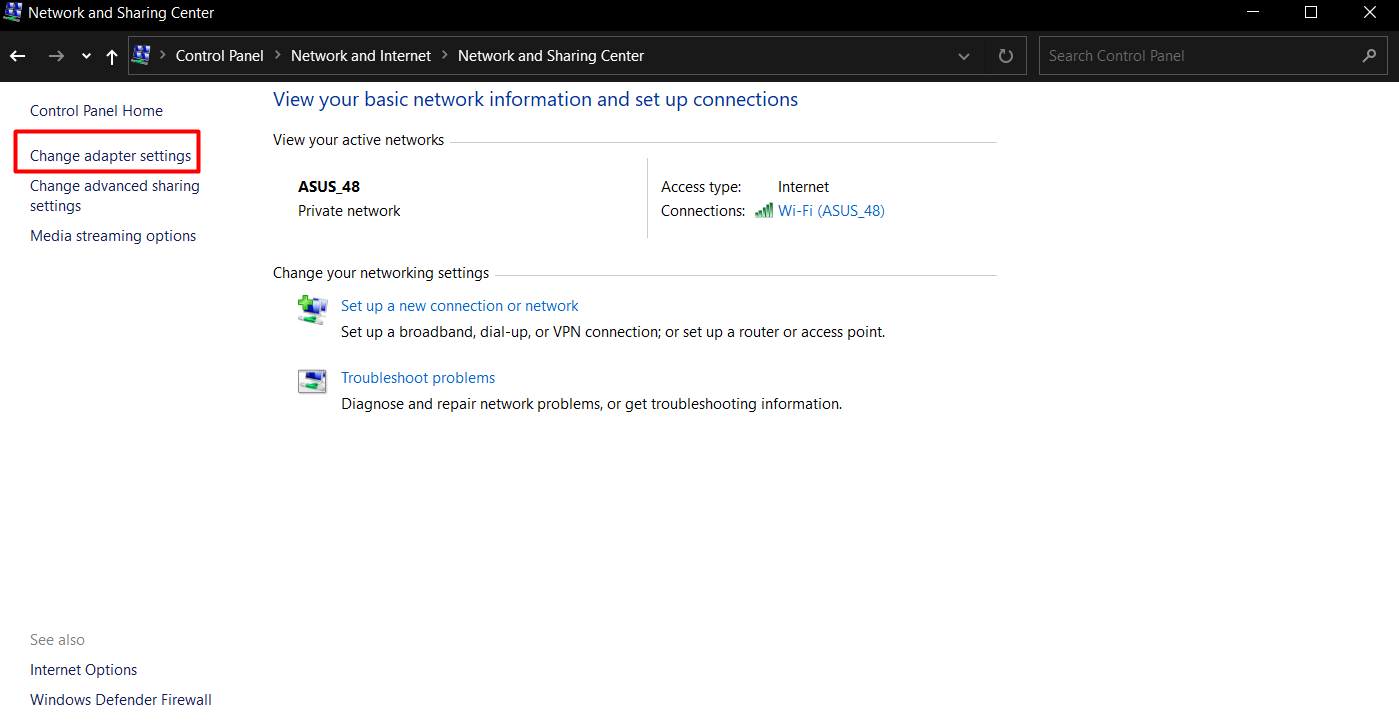
Step 2: Click Network and Sharing Center.

Step 3: Then Click Change Adapter Settings.
Step 4: Right-click on the network adapter which connects you to the internet and select Properties.
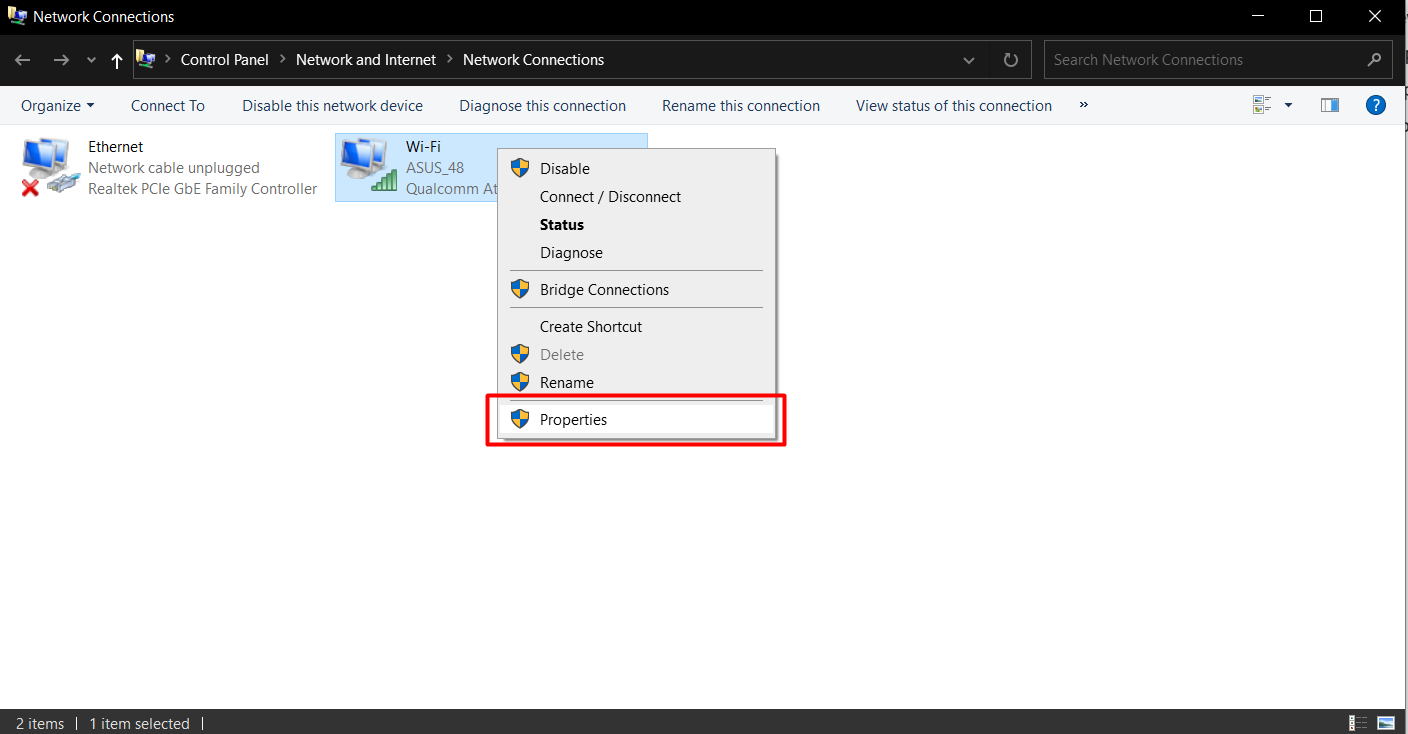
Quick tip: You'll know which adapter is connected to the network because it won't have a "Disabled" or "Network cable unplugged" label.
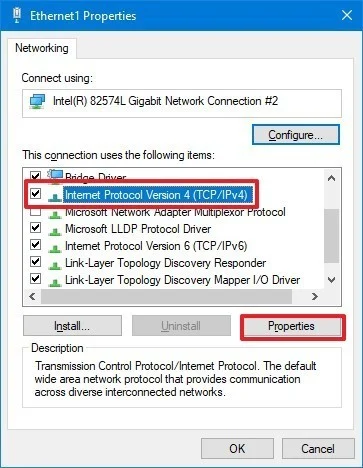
Step 5: Double-click on “Internet Protocol Version 4 (TCP/IPv4)"
Step 6: Enter IPv4 addresses 1.1.1.1 and 1.0.0.1
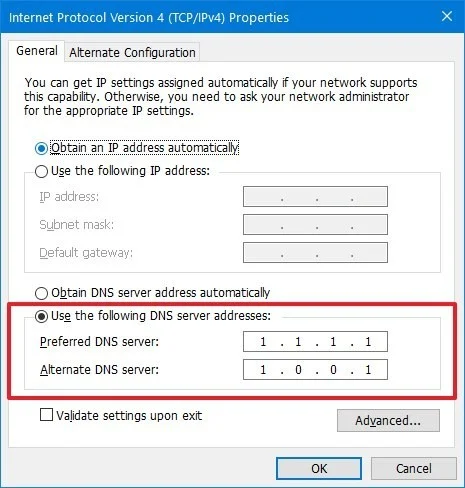
Step 7: Confirm the changes by clicking OK.